For SSO, the Moodle instance requires the plugin “OAuth 2” to be installed. Once installed, the plugin needs to be configured following these steps:
- Within Site Administration > Plugins > Authentication sub-menu go to the “Manage authentication” page (/admin/settings.php?section=manageauths). You must be logged in with a Moodle administrator account.

- Enable OAuth 2: Find the “OAuth 2” authentication plugin in the list of authentication plugins on that page. Enable “OAuth 2” by clicking the “Enable” button in its row.
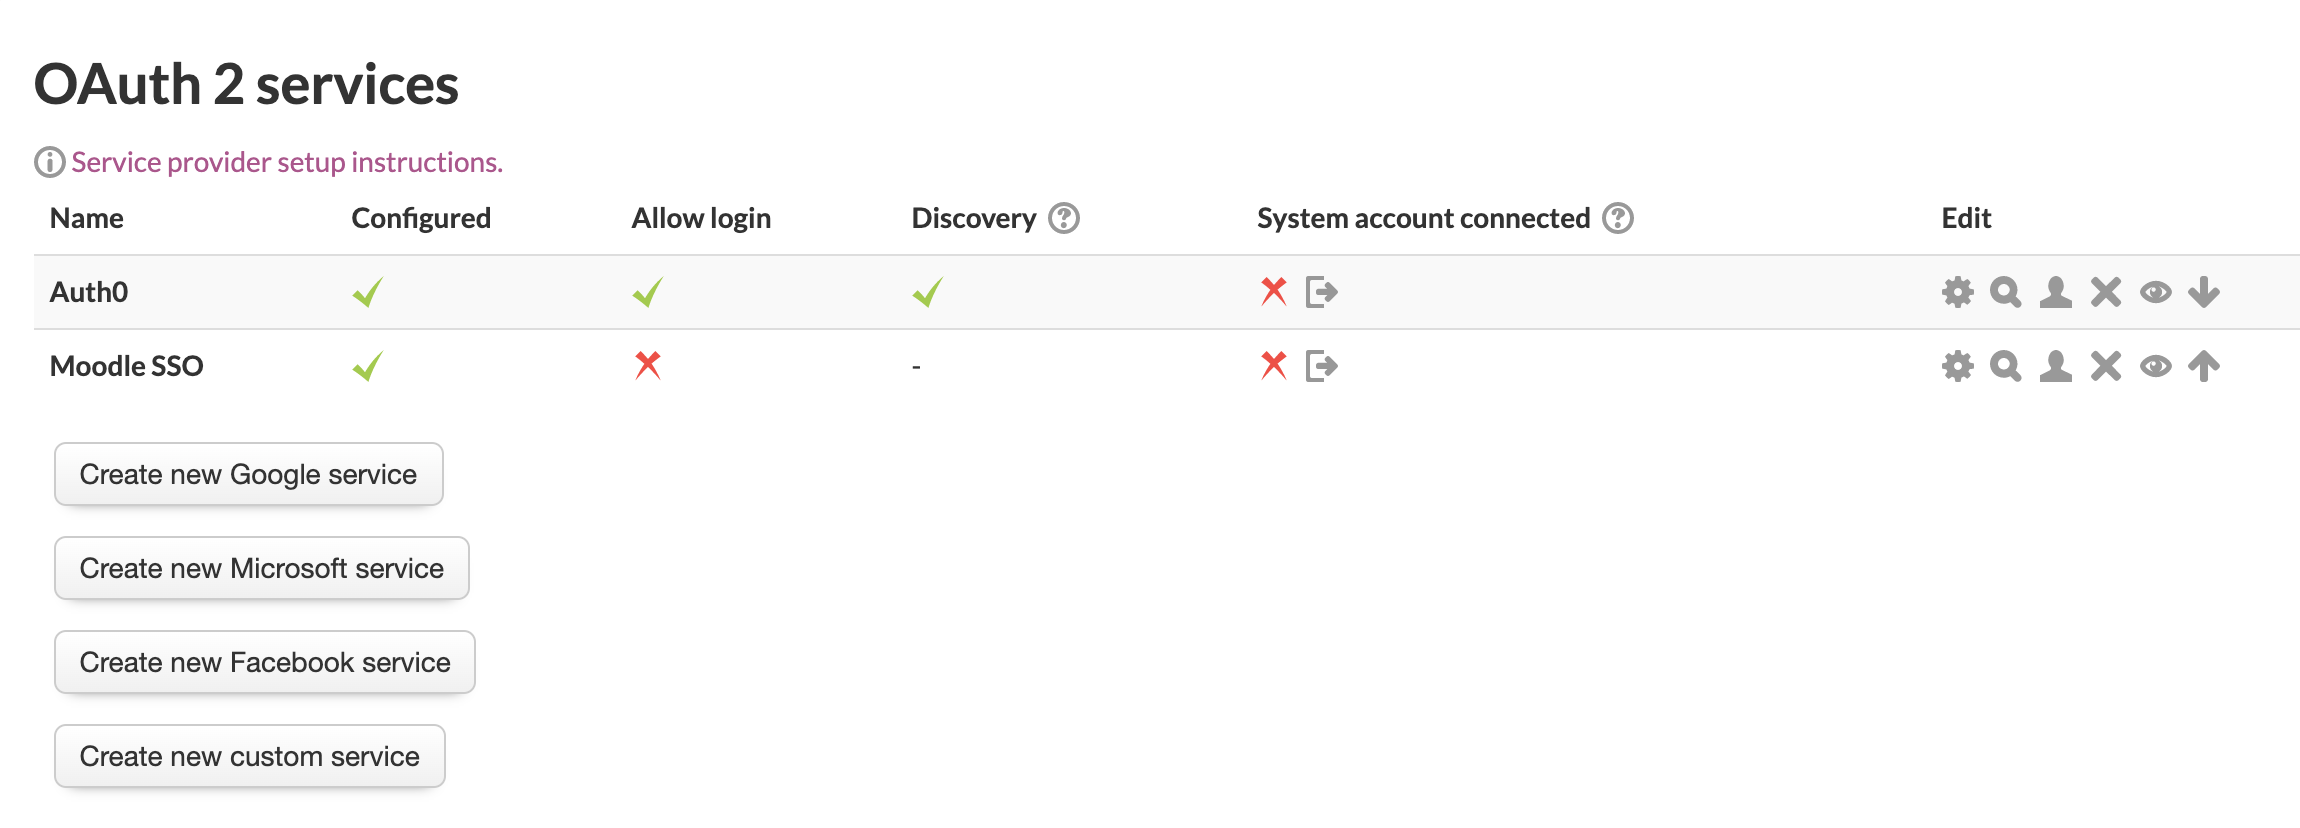
- Create OAuth 2 service: Go to the “OAuth” 2 services page (/admin/tool/oauth2/issuers.php), located in the Server > OAuth 2 sub-menu within the Site Administration section.
Click on the “Create new custom service” button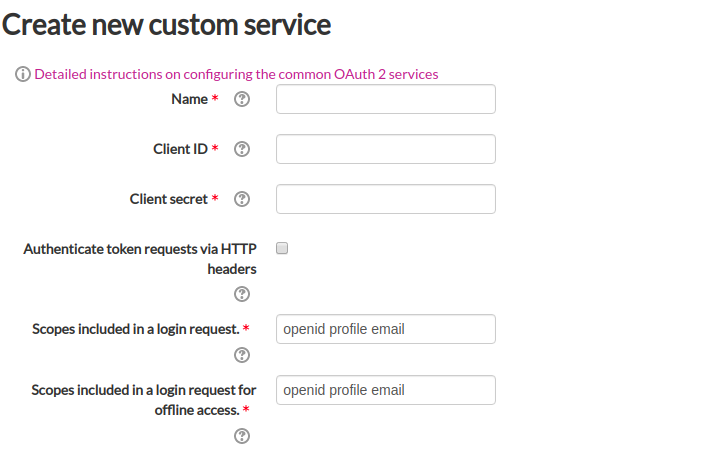
Enter the Name, Client ID and Client secret fields. The Name of the service will be the label of the SSO button on the login page. The Client ID and Client secret values must be provided by Wicket. Click “Save changes” to proceed.
- Configure OAuth 2 service endpoints: On the “OAuth 2” services page (/admin/tool/oauth2/issuers.php), click “Configure endpoints.”
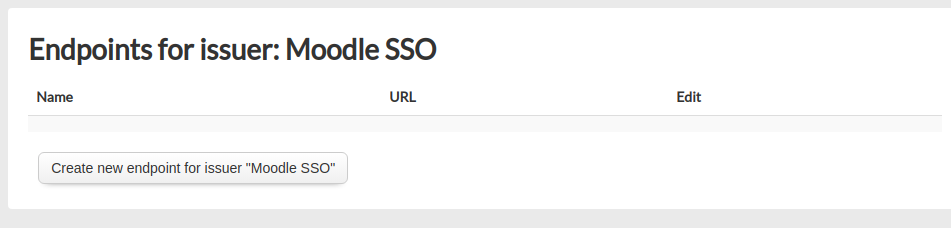
Click the “Create new endpoint for issuer” button.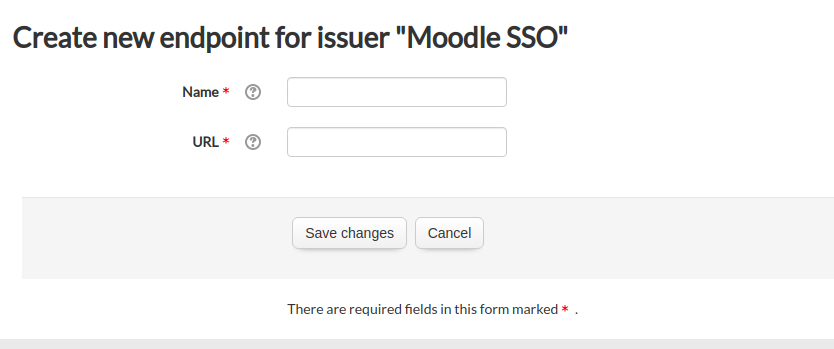
Create the following endpoints:
Name: authorization_endpoint
URL: https://{Wicket Login URL}/oauth2.0/authorize
Name: token_endpoint
URL: https://{Wicket Login URL}/oauth2.0/accessToken
Name: userinfo_endpoint
URL: https://{Wicket Login URL}/oauth2.0/profile
- Configure OAuth 2 service user field mappings: On the “OAuth 2” services page (/admin/tool/oauth2/issuers.php), click “Configure user field mappings.”
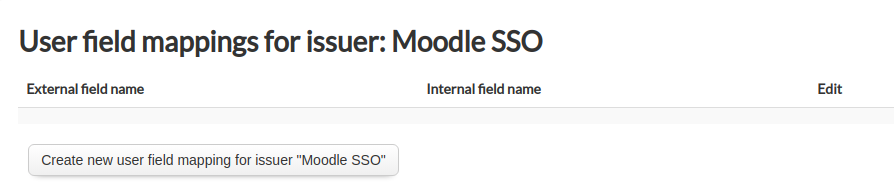
Click the “Create new user field mapping for issuer” button.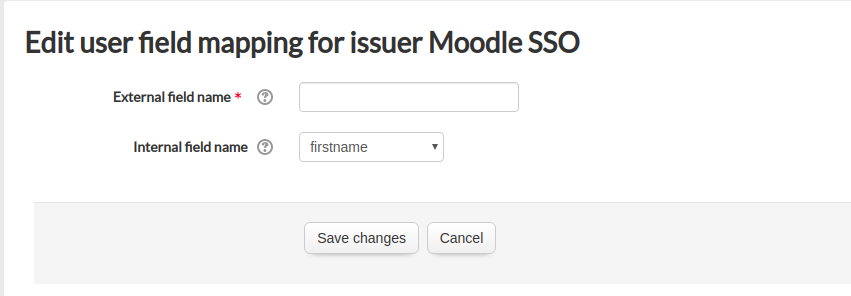
Create the following user field mappings:
External field name: attributes-email
Internal field name: email
External field name: attributes-givenName
Internal field name: firstname
External field name: attributes-familyName
Internal field name: lastname
After the completion of these steps, users will be able to login using SSO through a button located in the Moodle Login page. The label of the SSO button will be the name of the OAuth service created.
When users click the SSO Login button they will be redirected to Wicket’s login page. Once their Wicket login is successful, they will be redirected back to Moodle.
Comments
0 comments
Article is closed for comments.